
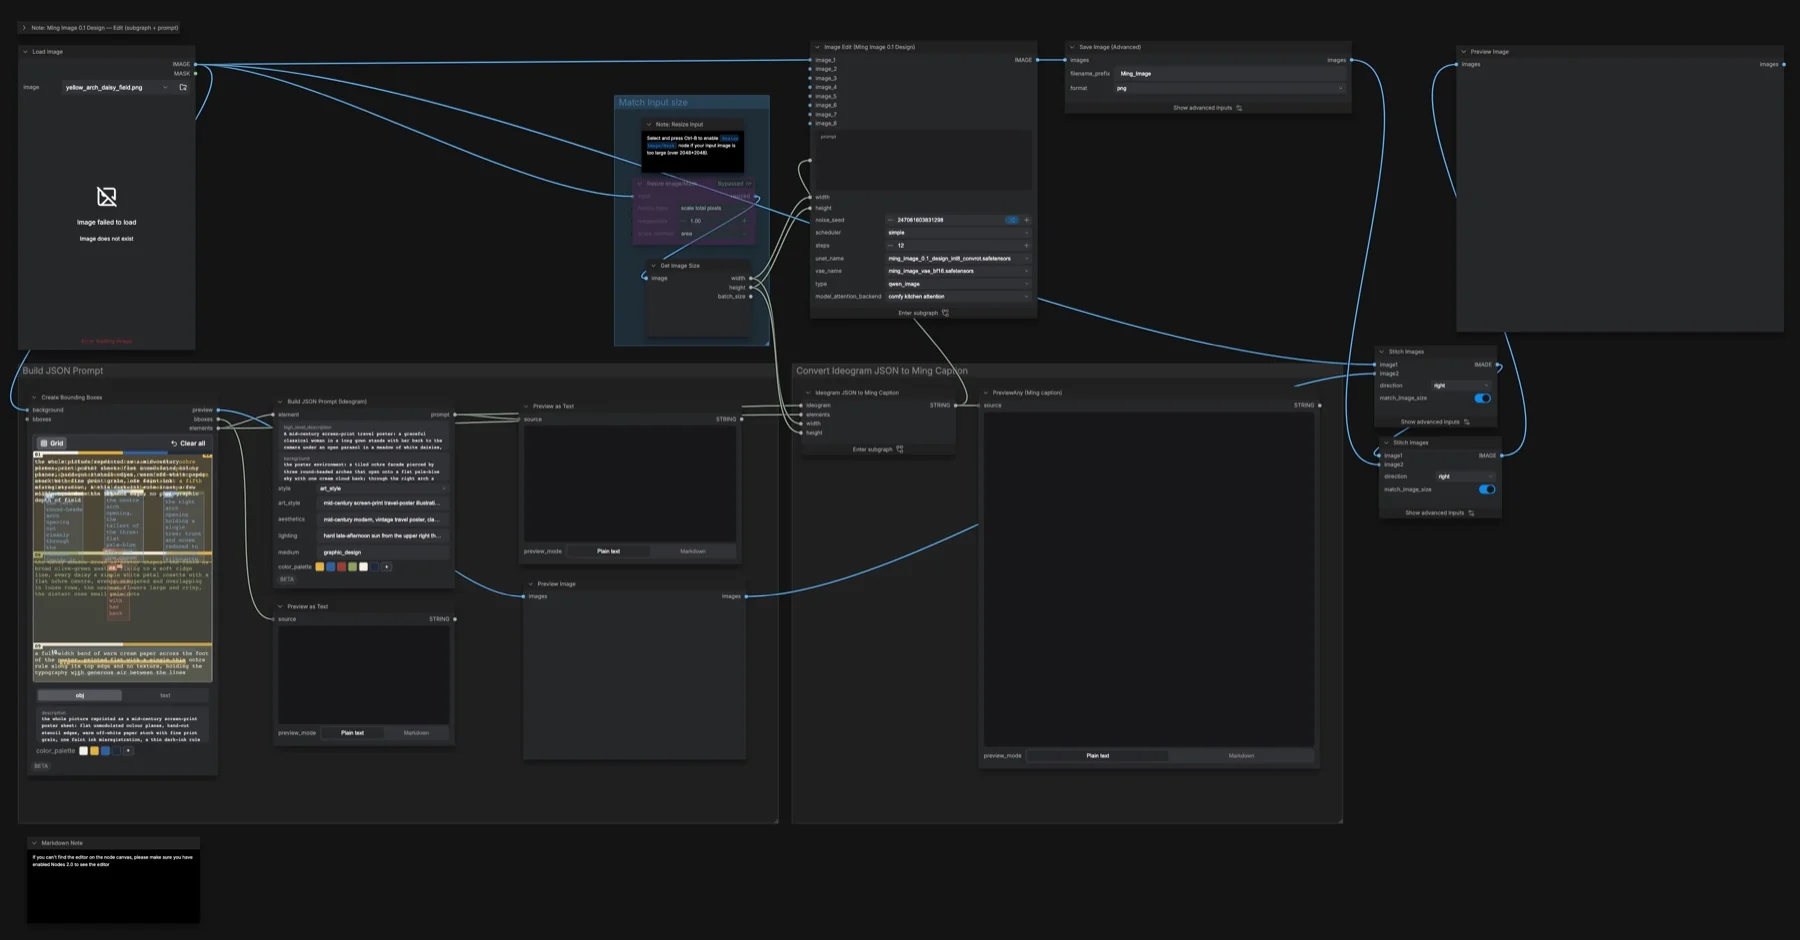
Short answer: this ComfyUI template re-renders one input image with Ming Image 0.1 Design. You draw boxes on the image, give each one a description and a colour palette, and the workflow turns them into Ming's own layer-by-layer caption. It samples for 12 steps with the LCM sampler and no CFG, at the size of your input image. The three files it loads total about 25.9 GB, and the Hugging Face repository lists the MIT licence, which allows commercial use.
Output example
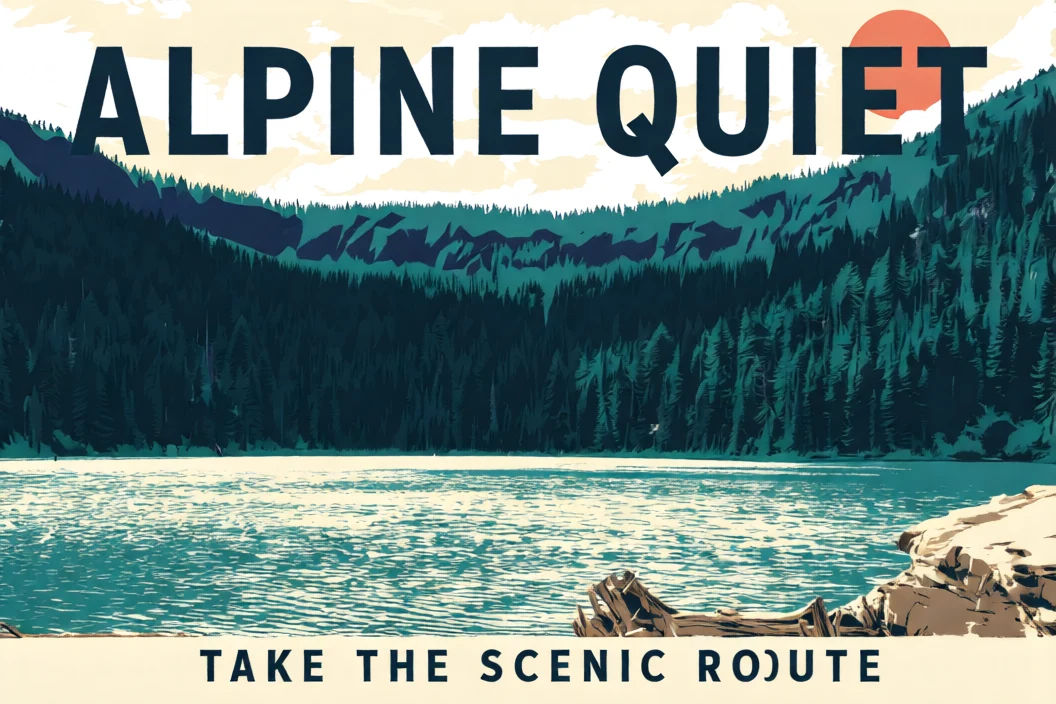
This workflow was run on a PC with an RTX 3090. We downloaded the saved output and inspected the image. It is one prompt and seed, not a general quality benchmark.
Input references
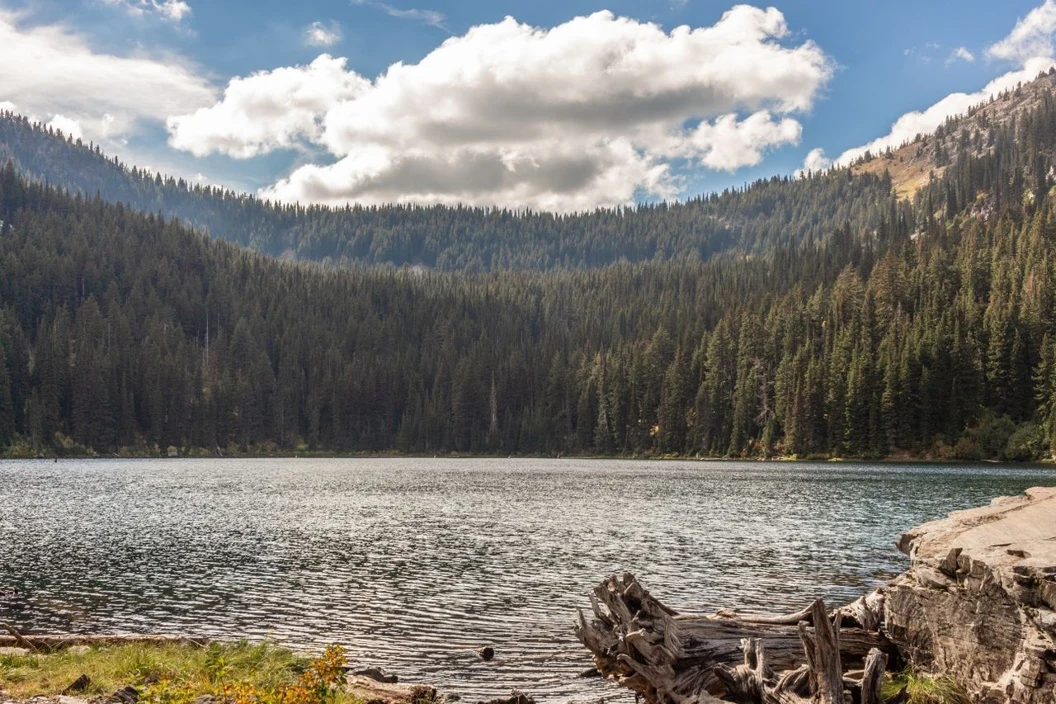
Clay Elliot · Source licence. Pillow proportional thumbnail to fit 1280x704, JPEG quality 95; upscale fixture fits 384x216, JPEG quality 80
Prompt used for this example
A vintage screen-printed travel poster based on the input mountain lake composition. Simplify mountain ridges into layered midnight-blue and teal paper-cut silhouettes, keep the forest shoreline and lake reflection, use a pale warm cream sky and a coral sun near the upper right. Across the upper left the large navy headline reads "ALPINE QUIET". A small centered footer reads "TAKE THE SCENIC ROUTE". Retain the recognizable source geography, use crisp flat ink shapes and subtle paper grain.Observed limits: Raster poster, not editable design layers. Source details are deliberately simplified.
Download and load the workflow
Drag the downloaded JSON file onto the ComfyUI canvas to load it.
Install the model files and any custom nodes listed below. If the workflow uses input images, video or audio, select your own files in the input nodes before running it.
Which files go where
| Part | File | Size | Folder |
|---|---|---|---|
| Diffusion model | ming_image_0.1_design_int8_convrot.safetensors | 6.18 GB | models/diffusion_models |
| Text encoder | ming_image_0.1_ling_mini_2.0_int8_convrot.safetensors | 19.51 GB | models/text_encoders |
| VAE | ming_image_vae_bf16.safetensors | 0.25 GB | models/vae |
The total is about 25.9 GB. The repository is not gated, and no custom node packs are needed. Unlike the text-to-image template, this one has no LLM prompt enhancer.
Settings in this workflow
| Setting | Value |
|---|---|
| Steps | 12 |
| Scheduler | simple, denoise 1 |
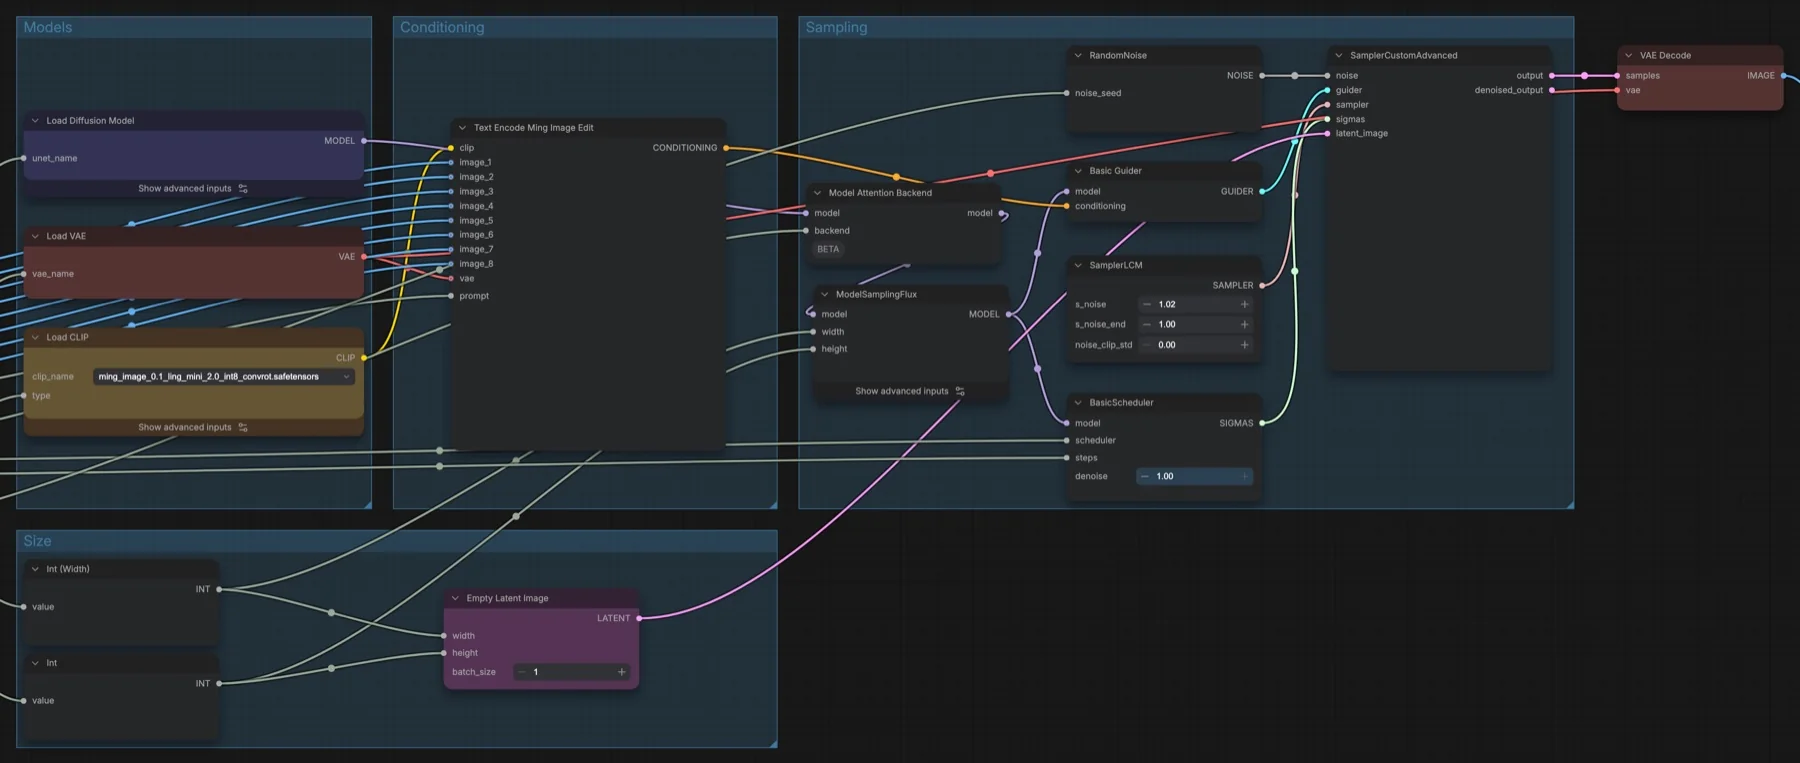
| Sampler | SamplerLCM: s_noise 1.02, s_noise_end 1.0, noise_clip_std 0 |
| Guidance | Basic Guider, positive prompt only (no CFG, no negative prompt) |
| Shift (ModelSamplingFlux) | max shift 1.15, base shift 0.5 |
| Seed | randomised after each run |
| Output size | Taken from the input image by Get Image Size |
| Resize Image/Mask | Bypassed (off); when on, scales to 1 megapixel with area |
| Box canvas | 896 × 1152, 12 boxes in the example |
| Attention backend | comfy kitchen attention |
| Output | Save Image (Advanced), PNG, 8-bit, sRGB |
CFG (classifier-free guidance) normally weighs your prompt against a negative prompt. The workflow notes say plainly: no negative prompt, no CFG.
How to use it
- Load your photo in Load Image. If it is larger than 2048 × 2048, select Resize Image/Mask and press Ctrl+B to turn it on.
- In Create Bounding Boxes, draw a box for each region you want to restyle. Give each box a type (object or text), a description and a palette. Text boxes also hold the exact words. If you cannot see the box editor, turn on Nodes 2.0.
- In Build JSON Prompt (Ideogram), describe the whole picture: high-level description, background, art style, aesthetics, lighting, medium and colour palette.
- Queue the run. Check PreviewAny (Ming caption) to read the caption the model receives.
- Compare the result in the stitched preview, and find the saved file under the
Ming_Imageprefix.
How the boxes become a caption
The Ideogram JSON to Ming Caption subgraph runs a loop with one pass per box. Each pass turns the box position into Ming's format (centre x, centre y, width and height, from 0 to 1), copies the description, adds the palette as colour codes, and writes text boxes as Text layer reading "…". The whole canvas is the first layer, and the rest stack from background to top. A nested Aspect Ratio subgraph works out the ratio from the image size, so the notes give 7:9, 896 × 1152 px as an example. Adding boxes or swapping the image needs no rewiring.
The notes list three ways to prompt. Keep the default Ming caption for precise control. Disconnect the caption output and type plain English into prompt. Or bypass the converter and wire Build JSON Prompt (Ideogram) straight into prompt. The edit subgraph has eight image inputs; only image_1 is required.
Licence
The Comfy-Org/Ming-Image repository lists the MIT licence, which allows commercial use. Our licence tracker compares the other open image and video models.
Troubleshooting
| Problem | Likely cause | Fix |
|---|---|---|
| Load Image shows an error | The example photo is not in your input folder | Upload your own image. |
| No box editor in Create Bounding Boxes | Nodes 2.0 is off | Turn on Nodes 2.0. |
| Nodes show as missing | ComfyUI is older than the template | Update ComfyUI and restart. |
| comfy kitchen attention is not in the list | The notes say it needs NVIDIA compute capability 7.5 or later, or AMD with ROCm | Pick pytorch attention: same result, slower. |
| Your input photo is very large | It is over 2048 × 2048, the limit the notes give | Turn on Resize Image/Mask (Ctrl+B). |
Where to go next
- Start from text instead: Ming Image 0.1 Design text to image.
- Instruction-based edits with an Apache-2.0 model: MOSS-Image image edit.
- Another layout-box approach: MOSS-Image layout boxes.
FAQ
Do I have to draw boxes?
No. The notes say you can disconnect the caption output and type a plain English instruction into prompt.
Can I use more than one reference image?
Yes. The edit subgraph has inputs image_1 to image_8. Only image_1 is required.
Why is there no negative prompt?
The workflow uses positive conditioning only. Put what you want to avoid in the box and style descriptions instead.
Sources
- Comfy-Org/Ming-Image on Hugging Face: ComfyUI weight files, MIT licence
- Ming-Image-0.1-Design model card: the official model page
- inclusionAI/Ming-Image on GitHub: code and the official rewriter system prompt that defines the caption format
- Example Ming caption: a complete caption to copy from
- Ling cookbook design skill: linked from the workflow notes